Upgrading to a new machine is exciting. The old one, however, becomes a liability. You could list it on eBay or Facebook Marketplace. You could drop it off for recycling. But there is a step you cannot skip before parting ways. You need to know how to wipe a computer cleanly.
Think about what sits on that drive. Financial records. Passwords for your bank accounts. Years of email. Maybe some photos you’d prefer stayed buried. If you just hit delete, that data isn’t gone. It’s just marked as available space. Anyone with the right tools can dig it back up.
This process sounds technical. It doesn’t have to be. Follow the steps below to reset your PC to factory settings. This gives you total peace of mind. Your next owner gets a clean slate. You get to sleep at night.
The High Cost of Data Recovery
Deleting a file is not the same as destroying it. Data thieves use specialized software to recover “deleted” files. They don’t even need to guess what you hid. They just scan the unused space.
Consider the case of a British man who learned this the hard way. His old hard drive failed. He sent it back to the manufacturer for replacement. They promised to scrub the drive. They didn’t. Instead, they mailed it to a crook in Latvia. That crook recovered bank statements and a mortgage application. He then blackmailed the owner for 100 pounds. The man paid up to get his data back.
This isn’t a fictional horror story. It’s a recurring threat. In 2009, British security researchers bought 300 used computers from various countries. They inspected the hard drives. One-third still contained owner data. We’re talking medical records from hospitals. Proprietary business documents. Test-launch information for ground-to-air missiles. The list goes on.
Data recovery is easy. Prevention is simple, but it requires action.
If you leave your old PC untouched, you are leaving the door open. Thieves don’t break in. They just download.
Resell or Recycle?
Before you decide where the hardware ends up, you must secure the data.
Selling the PC? You’re handing control to a stranger. A teenager? A collector? A competitor? It doesn’t matter. If the data is there, it’s gone.
Donating it? Charities often refurbish and resell devices. The same rules apply. Your personal info could end up on a desk halfway across the world.
Recycling it? Even if you send it to a certified e-waste facility, the drive might not be destroyed immediately. It could sit in a warehouse. It could be mishandled.
The safest path is always to wipe it yourself. Resetting to factory defaults removes your user accounts, your files, and your settings. It brings the machine back to the state it was in when you unboxed it.
Steps to Secure Your Data
You don’t need to be an IT expert to do this. Modern operating systems have built-in tools for this exact scenario.
For Windows users, look for the “Reset this PC” option. It usually lives in Settings > Update & Security > Recovery. You have two choices here: keep my files or remove everything.
The real question isn’t what’s next—it’s what you do with the box sitting under your desk.
If your PC or Mac has seen more sunrises than a decade, it’s time to let it go. Ten years is the magic number. Modern software won’t run on legacy hardware, and trying to force it is a recipe for frustration. So, you recycle it.
But here is the hard rule: do not throw it in the trash.
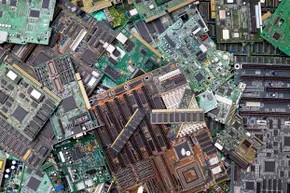
Regular landfills are not built for e-waste. Your computer is a cocktail of hazardous materials. Mercury. Cadmium. Lead. These heavy metals leach into soil and groundwater if left to rot. That’s bad enough. The better angle is that these devices are actually mines. Precious metals and rare earth elements inside the casing can be extracted and reused. Mining new materials is expensive and dirty. Recycling existing ones cuts the demand for both.
The process is simple.
- Remove the hard drive. Always.
- Take the rest of the tower or laptop to a local electronics recycling center.
This applies to PC users. Mac users have a slightly different path, but the logic holds.
If the machine is newer, selling or donating makes more sense than scrapping. But you have to decide on the data first. Do you wipe the drive yourself, or do you pay someone to do it?
For PC owners, Microsoft has a list of certified refurbishers. They use state-of-the-art security methods to ensure your data stays dead. You drop it off. They clean it. It gets a second life.
Apple offers a trade-in program. You ship the Mac. If the device has monetary value, you get store credit. It’s convenient. It’s clean. It’s hands-off.
But let’s be real. If you’re reasonably tech-savvy, you don’t need a middleman. You can do it yourself. It’s faster. It’s free. And you know exactly what happens to your data.
Before you wipe anything, you need a safety net.
9: Back Up Data Onto a Portable Drive
You can’t wipe the drive if you haven’t saved the files. This step is non-negotiable. Whether you sell, donate, or recycle, the data must leave the device before the device leaves your hands.
Get an external hard drive or a large USB stick. Plug it in. Copy everything. Documents. Photos. The weird folder you made in 2014 and forgot about. Check the files. Open a random spreadsheet. Make sure the copy worked.
Only then do you proceed to the wipe.
Before you even think about formatting the old drive or wiping the slate clean, you need to secure your data. The safest play? Grab an external hard drive and copy everything you care about over to it. Once that’s done, move those files onto the new machine’s internal SSD or HDD. This creates a redundant backup. If the migration process glitches—and it often does—you still have a safety net.
For Windows users, Microsoft provides a specific tool for this: Windows Easy Transfer. It’s a utility designed to let you pick and choose exactly what gets moved. We’re talking documents, music libraries, photos, email archives, system preferences, and even user accounts. To use it effectively, you’ll likely need a special transfer cable to link the old and new PCs directly. This bypasses network latency and gives you a direct line for your data [sources: Microsoft].
If you don’t have that cable, you can still do this manually. Plug a portable drive into a USB port on your old PC. Open Windows Explorer for both the internal drive and the external drive in separate windows. Click, drag, and drop. This method has a hidden benefit: housekeeping. You’ll see what’s actually taking up space. Do you really need that folder from 2014? Probably not. Ditch it now to save space on the new rig.
Mac Migration Is Simpler
Mac users have it easier. You don’t need an intermediary drive. Apple built Migration Assistant directly into the system, located in Applications/Utilities. You can plug your old Mac and new Mac together using a FireWire or Thunderbolt cable. The software handles the heavy lifting, moving files directly from one machine to the other.
Wireless transfer is also an option for both platforms, provided both machines are on the same network. It’s convenient, though often slower than a direct cable connection.
8: Deactivate/Deauthorize Your Software
Here is where most people mess up. They move their files, set up the new PC, and then try to install their software. It fails. Why? Because of licensing servers.
Most expensive software—from Adobe Creative Cloud to Microsoft Office—ties its license to a specific device ID. You’re usually allowed to activate it on two machines at once. If you install it on the new one without deactivating the old one, you might hit that limit. The software locks you out.
Before you wipe the old computer, open your major applications and look for a “Deactivate” or “Log Out” option in the help or account menus. This tells the vendor’s server, “This machine is no longer in use.” Once the server releases the license key, you can activate it on the new machine without hassle.
Don’t skip this step. Trying to call support to unlock your software because you forgot to log out is a waste of an hour you’ll never get back.
The golden age of software portability is long gone. Back in the late 1980s and early 1990s, you could simply copy your installation disks—or let’s be honest, grab a friend’s copy without much guilt—and slap them into a new PC. It was messy, it was chaotic, but it worked.
Today, that freedom is a memory. Manufacturers have tightened the screws. You can’t just copy-paste licenses anymore. You have to officially deactivate the software on your old rig and transfer the rights to the new one. It’s a bureaucratic hurdle, but skipping it risks losing access to tools you rely on.
How to deactivate and transfer software licenses
Start by auditing your old machine. Make a list of every program you intend to keep. Then, hunt down the specific deactivation process for each. There is no universal button. Each manufacturer plays by their own rules.
Take Adobe Photoshop, for instance. You can’t just drag the folder to a USB drive. You need to go to Adobe Creative Cloud, sign out of the application on your old PC, and kill the activation there. Only then can you install the software on the new machine and sign back in. If you skip the sign-out step, you might hit a license conflict that locks you out until you call support.
iTunes is even more rigid. You must manually deauthorize the old computer through your Apple ID settings. Then, on the new Mac or PC, sign in and authorize that machine. Only after that handshake completes can you sync your settings and download your purchased music from Apple’s cloud.
Skip the deactivation, and you might find your license count maxed out on the old machine, leaving you locked out on the new one.
7: Destroy Your Drive or Reuse It?
If you are parting ways with a PC but feel a pang of guilt tossing a perfectly good motherboard, RAM sticks, and an Intel processor into the e-waste bin, there is a smarter move. You don’t have to throw the whole machine away. Instead, extract your old hard drive to secure your data, then slap on a cheap, refurbished blank drive to keep the system alive.
It sounds like a hassle. It isn’t. Swapping out a hard drive is basically just moving cables and tightening a few screws. The only real catch? You need to match the type. You can’t just grab any drive off the shelf. It has to fit the interface your motherboard supports.
Choosing the Right Replacement Drive
Before you unscrew anything, you need to know what you are working with. Most modern desktops and laptops use either SATA drives or M.2 NVMe SSDs.
If you pull out an old SATA drive, you need a new SATA drive. Same goes for M.2. Mixing them up means a non-functional install. Check your current drive’s connector. Look at the back of the motherboard if you aren’t sure. SATA ports are L-shaped and distinct. M.2 slots are thin, card-like slots along the edge.
“The key aspect of this setup process is to replace the old drive with one that’s the same type.”
This isn’t just about fitting. It’s about compatibility. A SATA SSD will work in a SATA port, but an NVMe drive won’t. Putting an NVMe drive in a SATA slot is like trying to plug a USB-C cable into a USB-A port. It physically won’t go in.
The Physical Swap
Once you have the matching drive, power down the PC. Unplug it. Open the case. Locate the old drive. It’s usually mounted in a bay or screwed directly to the chassis.
- Disconnect cables. SATA drives have two connections: data and power. Both need to come off. M.2 drives are held by a single screw at the end.
- Remove the old drive. Set it aside. This is now your data vault. Keep it safe.
- Install the new drive. Slide the new drive into the slot or bay. Secure it with screws if needed.
- Reconnect cables. SATA drives go back in the same way. M.2 drives go in at a 30-degree angle, then lay flat and screw down.
It takes ten minutes. Maybe fifteen if you’re fumbling with cables. The rest of your computer—the CPU, the RAM, the graphics card—stays intact. You’ve just given it a new brain.
Why Refurbished?
Why buy new? A refurbished drive costs a fraction of the price. For basic tasks—web browsing, document editing, media playback—a used drive works fine. You aren’t running heavy video editing or gaming loads that need top-tier endurance ratings.
Check the health status if you can. Some sellers provide SMART data. If it’s clean, you’re good. If it’s suspicious, skip it. But generally, a refurbished drive is a cost-effective way to extend the life of an older machine without paying for brand-new plastic and marketing.
What About the Old Drive?
The internet is full of tutorials on how to murder a hard drive. Some people swear by the brute force method: yank the drive out, put on safety goggles, and smash it until it’s dust. It’s visceral. It’s satisfying. It’s also inefficient if you’re doing it at scale.
Others go for the elaborate. Drill holes. Hammer nails through the casing. Toss it in a fire. Soak it in diluted hydrochloric acid. Sure, the data is gone. But so is your health, or at least your lungs. Acid baths release toxic fumes that don’t care about your privacy concerns. Microwave ovens? They just create a mess and potentially ruin the appliance.
There is a safer middle ground. Disassemble the drive. Remove the platters. Then sand or grind the surfaces until they are unreadable. You’ll need a specific set of screwdriver bits, usually costing around $20, to crack open those tiny screws holding the casing together. Can you use a large flat-head screwdriver to pry it off? Maybe. But you risk damaging the internal components you’re trying to destroy, or worse, injuring yourself.
Then there’s the Hollywood approach. Remember Breaking Bad? The scene where they park a massive electromagnet next to a police evidence room to wipe the drives? That’s called degaussing. In reality, it rarely works the way it does on TV. Unless you have a truly industrial-grade magnet and can focus its field with surgical precision, you aren’t going to wipe anything. You’re just moving heavy metal around.
5: Have a Copy of the Operating System to Reinstall
You destroy the drive. Good. Now what?
You can’t just plug it back in and expect Windows or macOS to magically reappear. You need a way to get your OS back. This is where most people hit a wall. They assume the disc that came with their laptop is enough. It isn’t.
Manufacturers stopped including installation media years ago. If you bought a PC in the last decade, your recovery partition is likely the only copy of your operating system you have. And here’s the rub: recovery partitions are fragile. If you wipe the drive to delete data, you might accidentally wipe the recovery partition too. Or if the drive fails physically, the partition is gone with it.
You need a standalone copy. Not a backup of your files. A clean, bootable installer.
Why does this matter? Because reinstalling an OS from a USB drive is fundamentally different from using a recovery partition. Recovery partitions often include bloatware, driver bundles, and specific tweaks for your hardware model. A clean install gives you a fresh start. No junk. No telemetry you didn’t agree to. Just the OS.
But getting that installer isn’t automatic anymore. You have to create it yourself.
For Windows, you need the Media Creation Tool from Microsoft’s website. It downloads the ISO and writes it to a USB drive. For macOS, the process is more locked down. Apple Silicon Macs don’t create USB installers the same way Intel Macs did. You’re often reliant on internet recovery, which requires a stable connection and a valid Apple ID.
Which method is better? Clean install, always. It removes the accumulated rot of years of updates, registry errors, and software conflicts. But it
An OS is non-negotiable. The machine is useless without one.
If you are pulling the drive, you are done. If you are keeping the hardware, you need fresh software. Older Windows boxes often shipped with recovery discs. Check your desk drawers. Those discs are your safety net.
No discs? No problem. You can grab a fresh Windows 7 ISO from the Microsoft Digital River archive. You will need a USB stick with at least 4GB of free space. The Windows 7/USB/DVD Download Tool writes it for you. But here is the catch: activation requires a product key. That sticker is usually on the PC case itself. Don’t lose it.
Macs are different.
Ancient Macs need physical media. But if you have Lion or Mountain Lion, Apple changed the game. You do not need a disk. You can erase the drive and trigger a network recovery. The utility downloads the OS straight from Apple’s servers. We will walk through that process later.
4: Erase Your Data from the Hard Drive
This is the part people skip. Or botch.
You are not just deleting files. You are hiding them in the shadow of your free space. Anyone with a few hours and the right software can pull them back out. Deleting is not wiping.
Why does this matter? Because your browser history, your tax returns, your private photos—they are still there. Lying in wait.
If you sell a computer with just “empty” files, you are handing over your digital life.
The goal is to overwrite the data. Random characters. Zeros. Ones. It does not matter what you write, as long as it covers the old data. Once the old sectors are overwritten, the previous content is statistically gone.
How do you do it?
Built-in tools exist. Windows has a secure erase option in the drive properties (for older versions) or via third-party utilities that integrate with the OS. Macs have a “Secure Erase” option in Disk Utility. It gives you choices: one pass, two passes, three passes, or DoD 5220.22-M standard.
Do you need three passes? For most personal data, one pass is enough. The physics of modern drives means that a single overwrite makes recovery nearly impossible for the average thief. A determined adversary with lab equipment might still dig, but you are not selling to the NSA. You are selling to a student or a neighbor.
Where do you start?
Boot from a USB. This prevents the operating system from writing new data to the drive while you are erasing it. It ensures a clean slate.
Which tool do you use?
- DBAN (Darik’s Boot and Nuke) : Free, open-source, and effective. It wipes the entire drive. No exceptions. Good for old PCs.
- Mac Disk Utility : Built-in. Choose “Secure Erase Options” before you hit erase. Select the number of passes.
- Manufacturer tools : Some SSDs come with proprietary software. If you have an SSD, check the maker’s website. Standard overwrite tools might not work the same way on flash memory, and some manufacturers offer a “Secure Erase” command that resets the drive’s internal controller.
Why the difference for SSD
You might think holding down the power button is the hard reset you need. It isn’t. And deleting files? That’s a illusion of security. Experts warn that sophisticated thieves can pull your data back from the grave. Even repartitioning and reformatting a drive doesn’t guarantee your secrets stay buried. Traces linger. Ghosts in the machine.
You need software built for obliteration. Tools like DBAN (Darik’s Boot and Nuke) or Lavasoft File Shredder exist for this exact purpose. Lavasoft offers a specific advantage: selective wiping. You can target sensitive documents while leaving non-critical files untouched. It’s surgical, not shotgun.
Macs simplify the process, mostly. Boot from the recovery partition by holding Command and R during restart. Open Disk Utility. Navigate to the Erase tab. Under security options, select the 7-Pass Erase. This overwrites your data seven times. It’s thorough. It’s slow. Bring a tablet. Read an e-book. You’ll need the distraction.
Reformat the Hard Drive
Reformatting is often confused with wiping. It’s not. A standard reformat prepares a drive for use by creating a new file system structure. It does not scramble the underlying bits. The old data remains until overwritten by new files. For high-security needs, this step alone is insufficient. It’s the final step in a chain, not the chain itself. If you are selling the drive or decommissioning it, rely on the shredding tools first. Let the reformat be the clean slate that follows the demolition.
“Traces of data may remain, even if your repartition and reformat the drive.”
Why do people skip the shredding step? Convenience. It’s faster. They assume the act of deletion is final. It’s not. Digital footprints don’t vanish just because the icon disappears. They sit in unallocated space, waiting for a recovery tool to paint them back into visibility.
Which method do you choose? DBAN is bootable. It wipes entire drives, operating system included. Good for prepping a machine for a new owner. File Shredder is an application. You run it within your OS. Good for cleaning up specific folders before you sell the laptop.
On Windows, you’ll need to download a separate utility. On Mac, the built-in option is surprisingly robust, assuming you trust Apple’s implementation of the 7-pass algorithm. It’s military-grade. Or close enough.
The drive is blank. The data is gone. Or so it says.
Repartitioning the Drive
This is the step that feels a bit scary because of its finality. You are wiping the drive clean. Gone are the remnants of data, the installed software, and the current operating system. On the other hand, that isn’t necessarily a bad thing. You are also undoing any lingering software conflicts and destroying any malware that has infected the PC. Eventually, once you reinstall a fresh copy of the OS, it may run even better than before.
The first step is repartitioning your hard drive. If you are on a Windows PC, you can do this by opening the Windows Control Panel. Click System and Security, then Administrative Tools. Double-click on Computer Management. You will likely need to provide the password for your main user account. This is the one with administrator privileges that allows you to alter the computer’s settings.
Once inside, select Disk Utility, go to the Storage menu, and click Disk Management. Then select New Simple Volume. That will bring up a wizard program to guide you through the rest of the process. The process could take a few hours to complete.
Reinstall the Operating System
With the drive repartitioned and formatted, the slate is clean. Now you need to install a fresh copy of Windows. This usually requires a bootable USB drive or installation disc created earlier. Insert the media, restart the computer, and boot from the USB drive. You will be prompted to choose language settings, time and currency formats, and keyboard input methods. Click Next to begin the installation.
When prompted, choose Custom installation. This gives you full control over where the new OS is installed. Select the partition you just created. Click Next. The installation process will begin. Your computer will restart several times. Do not interrupt the power supply during this phase. The progress bar will move slowly at first, then speed up. It is a good time to step away and grab a coffee.
Once the installation is complete, you will be greeted by the Windows setup screen. You will be asked to create a user account. Enter your name and password. Choose privacy settings based on your preferences. Disable telemetry if you value your data privacy. Click Accept to proceed. The desktop will appear. It will look familiar, but cleaner. Empty of bloatware. Free of registry errors.
You will need to install your drivers next. Windows Update will likely handle most of them automatically. However, check your hardware manufacturer’s website for specific drivers, especially for graphics cards and chipsets. Update them to ensure optimal performance. Install your essential software. Web browser. Office suite. Antivirus. Configure your email accounts. Restore your files from the backup you made earlier.
Is it worth the effort? For many users, yes. A clean install can extend the life of an old PC significantly. It removes the digital clutter that accumulates over years of use. It restores speed and stability. The time invested upfront pays off in the long run. You are not just reinstalling software. You are resetting the relationship between you and your machine.
You thought wiping the drive was the end of it. It’s not. Now you have a black screen and a hole where your operating system used to be. The safety net you relied on—the manufacturer’s hidden recovery partition—is gone. You deleted it. Or the corruption ate it. Either way, the “reset to factory settings” button in the Windows Advanced Recovery menu is a dead end. You’re out of luck with the local tools.
So, what’s left?
You need a bootable installation disk. If you didn’t burn the discs the manufacturer included in the box, you’re going to have to go to Microsoft’s website. Download the media creation tool. Write it to a USB stick. Boot from that. Follow the prompts. It’s manual. It’s slow. But it works. You trade convenience for control, and frankly, you’ve earned the latter.
Macs? They play nicer.
If you’re on OS X Lion or Mountain Lion, the cloud becomes your hard drive. You wipe the data. You quit Disk Utility. You stay connected to Wi-Fi. Then you hit the Apple menu and select Reinstall OS X. The system grabs a fresh copy from Apple’s servers. It installs it. You log in. Done. It’s almost suspiciously smooth.
But if you’re stuck on an older version? The cloud trick doesn’t work. You need physical media. Plug in your backup system disk. Restart. Hold down the C key immediately. The Mac boots from the disc instead of the internal drive. From there, you can install the OS. It’s archaic. It’s reliable.
1: Make the Computer Shine
Clean install or not, the machine is a blank slate now. Dust. Grime. The residue of a thousand fingerprints. Before you even think about configuring your email client or syncing your cloud storage, look at the hardware.
A clean OS on a dirty machine feels wrong. It’s like putting a fresh coat of paint on a rotting frame. Start with the outside. Compressed air for the keyboard crevices. Microfiber cloth for the screen. Get into the ports. Get under the chassis if you’re comfortable with that kind of thing.
Then, once the dust is gone, you install the drivers. Not the generic ones Windows guesses at. The real ones. From the manufacturer’s site. Or the chipmaker’s. Audio. Graphics. Power management. If you skip this step, your laptop will run hot. Your fans will scream. Your battery life will tank.
Don’t rush to reinstall your apps. Sit with the bare system for a day. Watch how it behaves. Is it sluggish? Does it crash? Or is it fast, quiet, and stable? If it’s stable, you’ve got a foundation. If it’s not, you know the problem is hardware, not bloatware.
The goal isn’t just to have Windows or macOS back. It’s to have it back right. No leftover junk. No conflicting drivers. No shadows of the past. Just the machine, working as intended.
It sounds simple. It isn’t. But it’s the only way to really start over.
Your digital house is now swept. The factory reset is done, your personal files are safe in the cloud or on an external drive, and the internal security of your old machine is tighter than a drum. But there is one more hurdle before you hand over the keys: the physical state of the device.
A clean interior means nothing if the next owner sees a greasy fingerprint smudge on the bezel or a crust of old pizza crumbs in the trackpad. Nobody wants to buy a used computer that feels like a biohazard. So, take the extra five minutes to make it look cared for.
The Physical Cleanup
Start with a soft, damp cloth. Wipe down the chassis, the keyboard, and the screen. Do not spray cleaner directly onto the device; spray the cloth instead to avoid liquid seeping into the circuitry.
For the keyboard, use compressed air. Hold the can upright and blast the crevices. This kicks out the dust bunnies and microscopic debris that accumulate over years of typing.
If you are selling a desktop tower, unscrew the side panel. You will likely find a nest of dust bunnies behind the fans and power supply. A quick blast of compressed air here prevents the next user from dealing with overheating issues right out of the gate.
Laptops are trickier. Turn the unit upside down and gently shake it. Let gravity help dislodge the loose crumbs. Follow up with another round of compressed air at an angle to blow out what remains.
Finish with a microfiber cloth—like the kind you use for glasses—to polish the screen. Remove the streaks. The goal is to make the buyer feel like they are getting a machine that was respected, not just abandoned.
Wipe Computer FAQ
How do you wipe a computer clean to sell it?
Data backup is step zero. Once your files are safe, you have three paths to clear the drive. You can physically remove the hard drive, destroy it, or sell it separately. You can also use software to overwrite the data, rendering it unrecoverable. Alternatively, a full factory reset or reformat does the job for most consumers.
Is it okay to factory reset a laptop?
Yes. In fact, it is often the best move. If your system is sluggish or plagued by application errors, a factory reset gives you a fresh start. It also acts as a nuclear option against malware, stripping out unwanted programs and viruses that standard antivirus scans might miss.
Is it possible to completely wipe a computer?
Technically, yes. But there is a catch. Security experts warn that “deleted” data can sometimes be recovered by sophisticated actors using forensic tools. Even if you repartition and format the drive, traces of your old life might linger in the magnetic sectors. For most people, a standard reset is enough to keep out the casual thief. For high-security needs, you need more aggressive wiping software.
Is it a good idea to wipe your computer?
Absolutely. If you are upgrading, selling, or recycling, wiping is non-negotiable. It removes malware. More importantly, it protects your identity. Your tax records, photos, and passwords don’t belong in someone else’s hands. A wipe ensures your sensitive data stays with you.
What does it mean to wipe your computer?
Wiping means making all data on the hard drive unreadable. It is the digital equivalent of shredding documents. This process is standard procedure before disposing of a device, ensuring that personal information doesn’t fall into the wrong hands. It renders the storage space blank, ready for a new user to write their own story.